
Attic Conversions That Add the Most Value to Your Homes Resale Price
When homeowners search for ways to increase their property’s valuation, attention often turns to major renovations like modernizing a kitchen or expanding outdoor living areas. However, one of the most lucrative and underutilized assets sits directly under your roof. Finishing an unutilized attic offers an exceptional return on investment (ROI) by transforming raw overhead square footage into premium, fully integrated living space.
Unlike subterranean basements, which may lack natural light and carry humidity risks, or garage conversions that sacrifice off-street parking, a finished attic provides elevated, light-filled living space. Real estate appraisers and prospective buyers view finished attic square footage as a seamless expansion of the home’s usable footprint, provided the renovation satisfies local building codes, maintains proper headroom clearances, and features dedicated climate control.
Transitioning a dusty storage area filled with holiday decorations into a high-value living suite requires strategic planning. You must evaluate floor joist load capacities, install code-compliant stair access, frame around sloped rooflines, and establish a tight thermal building envelope. This comprehensive guide details the highest-ROI attic layouts, structural considerations, climate controls, and project logistics needed to maximize your home’s resale value.
Creating a Primary Bedroom Suite with a Private Bath
Converting an unutilized attic into a secluded primary bedroom suite with an ensuite bathroom is consistently one of the highest-yielding home improvement projects. Adding a true primary suite increases your home’s official bedroom and bathroom count, two primary metrics that drive real estate appraisal values and online property search filters.
Designing a comfortable bedroom suite within a sloped attic requires creative spatial awareness. To comply with standard residential building codes (often referred to as the “50-50-7 Rule”), at least 50% of the finished ceiling area must maintain a minimum height of 7 feet. Position key living zones, such as the bed, vanity, and walk-in shower, under the highest ceiling peaks. Reserve low-clearance areas along perimeter knee walls for built-in dressers, low-profile nightstands, or custom shoe storage.
Integrating an ensuite bathroom directly into the attic footprint requires careful plumbing logistics. To minimize construction costs and reduce structural modifications, position the new bathroom directly above an existing lower-floor plumbing stack. This alignment allows contractors to tie supply lines and drain pipes into existing vertical stacks without cutting through major structural floor joists.
To dramatically increase usable floor area and natural lighting, consider framing dormer additions along the roofline. Shed dormers or doghouse dormers raise sloped ceilings to create full-height vertical walls, turning tight roof angles into bright, spacious alcoves perfect for a double vanity or a freestanding soaking tub.
- Maximize ceiling height rules: Ensure at least half the finished space meets the 7-foot ceiling height threshold to count as official square footage.
- Align plumbing over lower stacks: Place new bathroom fixtures directly above existing lower-level plumbing runs to minimize piping costs.
Designing a Flexible Home Office or Dedicated Hybrid Work Sanctuary
The demand for dedicated, quiet home office spaces remains at an all-time high among modern home buyers. A top-floor attic conversion naturally insulates remote workers from daily lower-floor household noise, creating an ideal environment for video calls, deep focus, and daily productivity.
When designing a high-value attic office, electrical infrastructure and data connectivity must be prioritized before hanging drywall. Running dedicated 20-amp electrical circuits and cat6 Ethernet wiring into knee wall cavities ensures reliable power for high-performance computers, dual monitors, and network equipment. Outfitting knee walls with integrated access panels makes future wiring upgrades simple without disrupting finished walls.
Custom carpentry is essential for optimizing sloped ceiling layouts. Framing built-in L-shaped desks, filing cabinets, and open book displays into low-clearance eaves keeps the central floor space open and uncluttered. Applying sound-dampening insulation—such as mineral wool batts—within subfloors and interior partition walls blocks ambient noise from lower floors.
Clearing out decades of accumulated storage, heavy holiday boxes, and old furniture is the necessary first step before framing can begin. If your garage or lower level lacks extra room during construction, utilizing a professional moving service to transport non-essential household belongings to a secure off-site storage unit keeps your workspace clear for sub-contractors and framing crews.
- Install dedicated electrical circuits: Run multiple outlets and hardwired Ethernet connections to power heavy office technology.
- Incorporate built-in knee wall desks: Frame custom workspaces and filing cabinets directly into low-clearance perimeter walls.
Building an Independent Guest Suite or Income-Generating Micro-Apartment
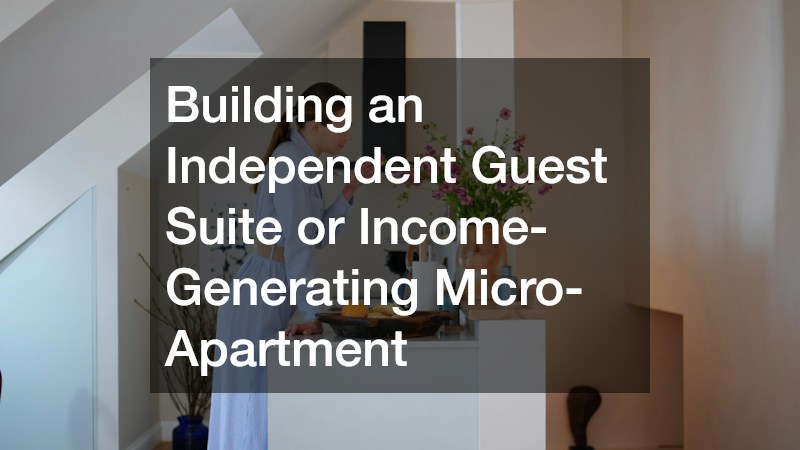
Creating an independent top-floor guest suite or micro-apartment adds tremendous lifestyle versatility and long-term financial equity. Whether designed to house extended family, host out-of-town guests, or function as a licensed short-term rental unit, a self-contained attic apartment appeals strongly to multi-generational buyers.
A functional micro-apartment incorporates three core zones: a sleeping area, a private bathroom, and a compact kitchenette. Keep kitchenettes lean by utilizing under-counter refrigeration, induction cooktops, built-in microwave drawers, and compact quartz countertops. Ensure kitchen plumbing vents connect properly to roof stacks to maintain code compliance and eliminate cooking odors.
Before drafting plans for an income-producing unit, consult local municipal zoning regulations, single-family zoning restrictions, and building codes governing Accessory Dwelling Units (ADUs). Many jurisdictions require dedicated exterior staircases, secondary emergency egress points, and separate electrical sub-panels for legally non-conforming secondary suites.
Hauling heavy building materials—such as subfloor plywood, cement board, drywall sheets, and kitchen cabinetry—up narrow interior staircases requires significant physical labor and care to prevent damaging lower-floor drywall and trim. Coordinating with professional movers equipped with heavy-lifting straps and wall protection pads ensures heavy appliances, vanity tops, and framing lumber reach the top floor safely without damaging lower-level walls.
- Design compact kitchenette layouts: Install space-saving under-counter appliances and induction cooktops to maximize living space.
- Review local ADU zoning codes: Verify municipal guidelines regarding secondary dwelling units, egress requirements, and utility metering.
Upgrading Structural Envelopes, Roof Integrity, and Weather Defense
A top-floor living space is only as secure as the roof envelope above it. Investing thousands of dollars into custom finishes, luxury flooring, and high-end cabinetry inside an attic makes no sense if an aging roof or failing gutter system allows water to penetrate the space. Upgrading structural weather defense systems is an absolute prerequisite for any attic conversion.
Before installing insulation or framing ceiling cavities, conduct a comprehensive roof deck inspection from the inside. Look for water staining along rafter bays, delaminating plywood, soft spots, or rusting nails. If your asphalt shingle or metal roof is approaching the end of its functional lifespan, schedule a full replacement before finishing the interior.
Hiring certified, experienced roofers to strip aging shingles, repair damaged decking, and lay heavy-duty synthetic underlayment guarantees your newly finished interior is protected against heavy rain, wind, and ice dams for decades.
Protecting your new living space also requires upgrading your home’s exterior drainage networks. Increased roof runoff must be directed away from your home’s foundation walls. Executing a complete gutter installation featuring seamless 6-inch aluminum gutters and oversized downspouts prevents roof water from backing up under eaves or pooling around foundation footings.
For homes in coastal regions or areas prone to severe weather, replace drafty gable windows or old dormer units with impact-resistant hurricane windows. These heavy-duty window units provide superior thermal insulation, reduce exterior noise transmission, and resist extreme wind pressures and flying debris during severe weather events.
- Inspect roof decking thoroughly: Check rafter bays for rot, delamination, and historical leak stains before framing ceiling cavities.
- Replace aging roofs before finishing: Contract licensed roofers to install new underlayment and shingles to protect your interior investment.
Controlling Climate, Insulation, and Pest Prevention Infrastructure

Attics experience the most extreme temperature swings in a home. Because heat rises in winter and solar radiation bakes roof shingles in summer, an improperly insulated attic will be uncomfortably hot in July and freezing in January. Achieving year-round thermal comfort requires advanced insulation strategies and dedicated climate control.
Standard fiberglass batt insulation is often insufficient for attic knee walls and rafter bays. The most effective insulation solution for finished attics is closed-cell spray foam insulation applied directly to the underside of the roof deck. Closed-cell foam creates a seamless air barrier, provides a high R-value per inch (typically R-6 to R-7 per inch), and acts as a vapor barrier, preventing indoor humidity from condensing against cold roof decking.
Maintaining continuous roof deck ventilation is critical when creating a “conditioned attic.” Install plastic baffle vents (soffit chutes) along rafter bays before spraying foam or installing batts. These baffles maintain an open airflow pathway from soffit vents up to the ridge vent, preventing moisture accumulation and ice dam formation.
Heating and cooling a top-floor conversion is best handled by installing an independent ductless mini-split heat pump system. During installation, HVAC technicians utilize specialized recovery tools, high-capacity vacuum pumps, and manifold pressure gauges to pull deep vacuums on copper refrigerant lines, removing moisture and air before charging the system.
Before sealing knee walls with drywall, establish a complete pest barrier. Attics are primary entry points for wild animals seeking shelter. Inspect fascia boards, soffit vents, and roof intersections, sealing every gap larger than a quarter inch with steel mesh and expandable foam to prevent rodents and bats from entering wall cavities. Executing professional rodent control measures and applying pest barriers before closing up walls prevents structural wire damage and health hazards.
- Apply closed-cell spray foam: Create an airtight thermal envelope directly under the roof deck to regulate extreme seasonal temperatures.
- Maintain soffit-to-ridge ventilation: Install plastic rafter baffles to ensure continuous airflow under roof decking and prevent ice dams.
Evaluating Cost vs. Value: Attic Conversion vs. Traditional Addition
When evaluating how to add square footage to your home, homeowners generally choose between two primary options: converting an existing attic space or building a ground-up addition. Analyzing the financial metrics, appraisal advantages, and construction timeline of each approach clearly demonstrates why attic conversions yield higher relative ROI.
Ground-up additions are capital-intensive projects. They require expensive site excavation, foundation footings, concrete slab pours, exterior wall framing, and a brand-new roof structure. In contrast, an attic conversion utilizes your home’s existing structural footprint, foundation, and roof envelope, redirecting your renovation budget toward high-end interior finishes, custom carpentry, and luxury fixtures.
From a cost-per-square-foot perspective, finishing an attic typically costs 30% to 50% less than building a traditional ground-up home addition of comparable size. Because the primary structural shell already exists, construction timelines are significantly shorter, causing far less disruption to your daily household routine.
Appraisers evaluate finished attic space favorably when it meets all local building code standards: permanent staircase access, adequate ceiling headroom, proper thermal insulation, and integrated heating and cooling. Adding 400 to 800 square feet of finished living area upstairs can bump your home into a higher pricing tier within your neighborhood.
Before finalizing your floor plan, consult with a trusted local real estate agent to review neighborhood comparables. Ensuring your planned layout—whether a primary suite, home office, or guest apartment—aligns with regional buyer preferences ensures your investment converts directly into maximum resale equity when it comes time to sell.
- Capitalize on existing foundations: Save money on excavation and foundation framing by utilizing your home’s existing structural shell.
- Lower cost-per-square-foot metrics: Complete living space expansions for 30% to 50% less capital than a ground-up home addition.
Key Performance Indicators for Attic Conversion ROI

Tracking these financial and operational metrics helps ensure your renovation project stays within budget while maximizing resale value:
- Cost per Square Foot: Total project expenditure divided by the finished usable floor area (aim for a cost well below your market’s average sale price per square foot).
- Ceiling Height Ratio: The percentage of floor area meeting the 7-foot ceiling height requirement (must exceed 50% to count as official finished square footage).
Transforming Overhead Space into Lasting Home Equity
Converting a dusty, underutilized attic into a beautifully finished living space is one of the smartest strategies for expanding your home’s functional footprint while driving significant long-term resale value. Whether you design a luxurious primary bedroom suite, a quiet home office sanctuary, or an independent guest apartment, finishing your top floor turns forgotten overhead space into an attractive asset.
Success relies on executing the project with structural discipline and attention to detail. Prioritize building code compliance, reinforce floor joists, protect your building envelope with certified roofing and drainage upgrades, install high-performance insulation, and select layouts that resonate with modern buyers.
Take time to plan your conversion carefully. Consult with licensed architects, structural engineers, and experienced trade contractors to bring your vision to life. By investing in high-quality craftsmanship and smart spatial design, you will enjoy a comfortable, light-filled top-floor space today while securing high financial returns when you decide to sell your home.